Email
Client Configuration - POP3
Operating
System: Windows
Email Program: Microsoft Outlook
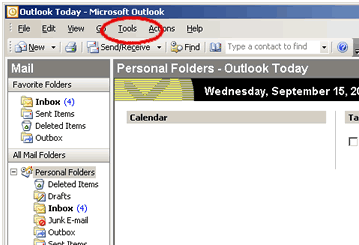
1. Open
Outlook and click on the Tools menu.
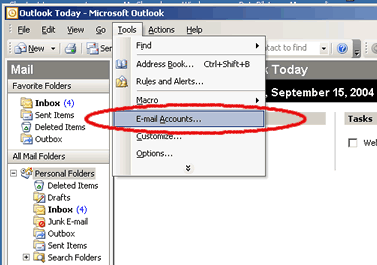
2. Click
on 'E-mail Accounts'.
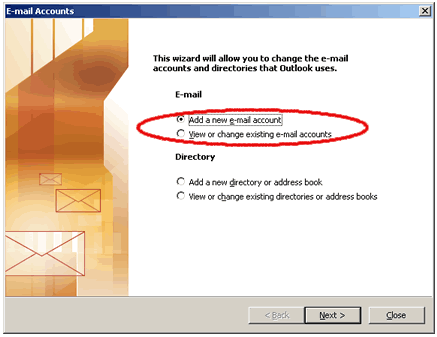
3. The Email
Account wizard opens. Select 'Add a new e-mail account' and press 'Next'.
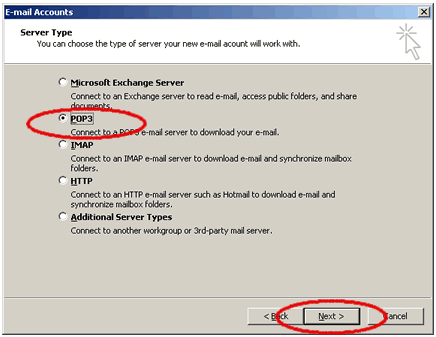
4. Select
'POP3' and click on 'Next' to continue.
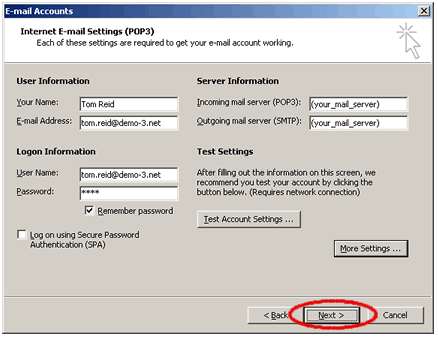
5. Note:
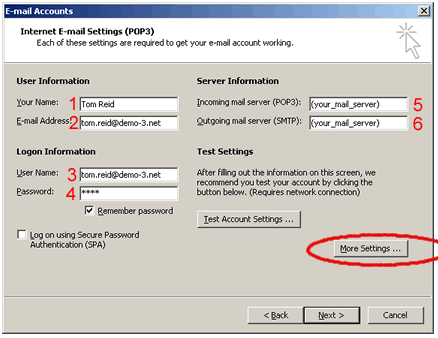
You will receive these email settings from your mail administrator. Enter
the following items;
- Your
name
- Your
email address
- Your
POP3 username. This is your full email address (for example 'tom.reid@demo-3.net')
- Your
password and check the box 'Remember Password'.
- Your
incoming mailserver (also known as your POP3 server.)
- Your
outgoing mailserver (also known as your SMTP server.).
Click on
'More Settings' to continue.
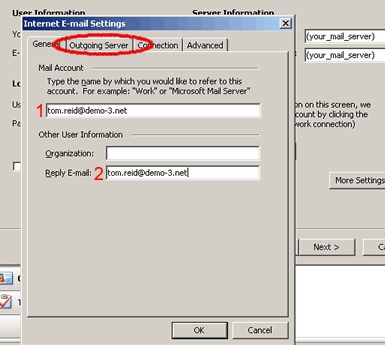
6. Enter
a name for your mail account. We suggest you use your email address. Then
enter your email address again for your reply email address. Click on
the 'Outgoing Server' tab to continue.
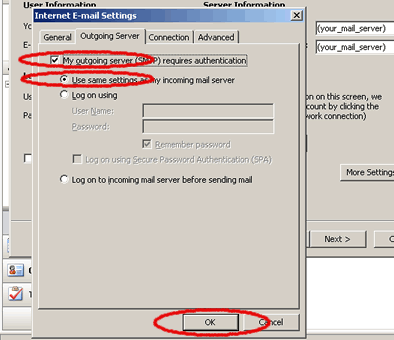
7. Check
the box for 'My outgoing server requires authentication' and select 'Use
same settings as my incoming server'. Then click on 'OK' to continue
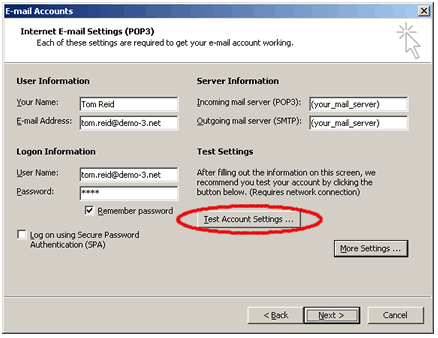
8. To test
your settings and to make sure you can connect to our mailservers click
on 'Test Account Settings ... '.
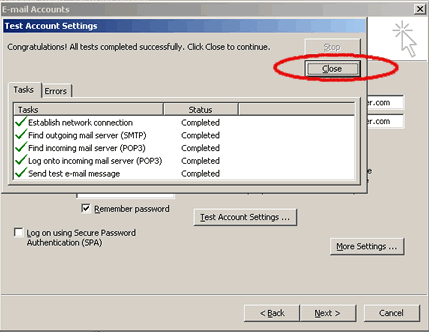
9. If the
test is successful you will a screen similar to the one below. If not
go back and check your settings and check the troubleshooting section
in this manual. Click on 'Close' to continue.
Note: If
the test does not 'Find outgoing mailserver' or cannot 'Send a test e-mail
message' and all of your settings look correct then you should check with
the provider of your Internet connection. Many cable, telephone and dial-up
Internet providers block connections to remote outgoing mailservers (SMTP)
to prevent spamming from their networks. If so, you will need to use your
internet provider's outgoing mailserver. Get the name of the mailserver
and enter it in the 'Outgoing mail server' text box. Then try the test
again.
10. Click
on 'Next' to continue.
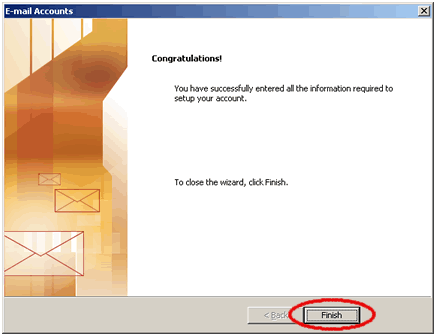
11. Click
on 'Finish' to complete the setup.
Return
to Support

