Autoresponders
In this
section we'll show you how to:
- Add a
new autoresponder
- Modify
an existing autoresponder
- Delete
an autoresponder
An autoresponder
is a special email address that automatically sends back a reply when
it receives an email. As an example, you might setup an autoresponder
with an email address 'productline-info@yourdomain.com'. Then when someone
sends an email to this address the autoresponder automatically sends back
an email with information on your product line. Or you might setup an
autoresponder called 'sales@yourdomain.com' that automatically acknowledges
receipt of the customers email and lets them know that a sales rep will
answer their email within 24 hours. In this case a copy of the email is
also forwarded to a sales rep.
Add
a New Autoresponder
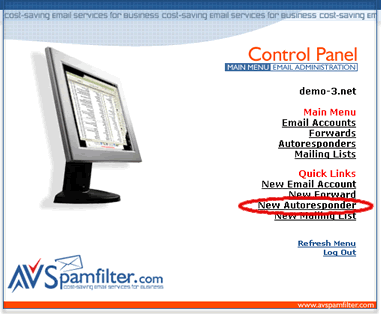
1. Click
on 'New Autoresponder' in the Main Menu.
2. Enter
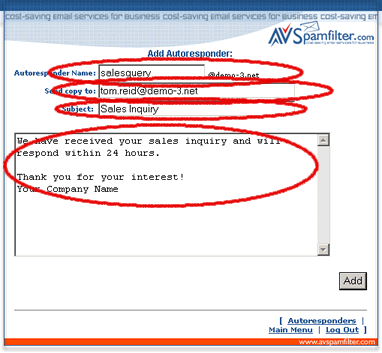
the autoresponder name (which will also be the email address of the autoresponder),
one or more email addresses that you want copies of the original email
sent to (separate multiple addresses with commas), the subject for the
email that will be sent back and the text for the body of the email. Then
click on the 'Add' button.
3. If successful
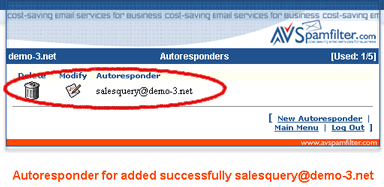
you'll see the action message in red (below) and the new autoresponder
will be added to the list of autoresponders in your account. Otherwise
check that theautoresponder name does not duplicate an existing email,
forward, autoresponder or mailing list name and try again.
Modify
an Existing Autoresponder
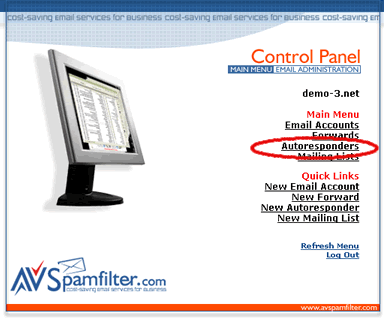
1. Click
on 'Autoresponders' in the Main Menu.
2. Click
on the modify icon for the autoresponder you wish to modify.
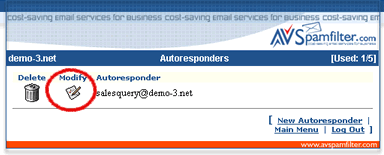
3. You can
change the 'copy to' address, autoresponder subject and autoresponder
text. Then click on the 'Modify Autoresponder' button.
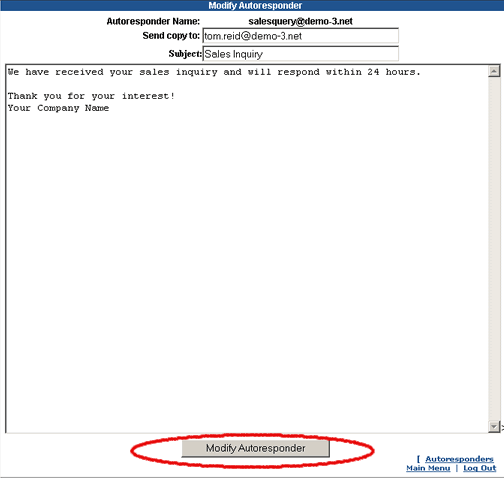
3. If successful
you'll see the action message in red (below).
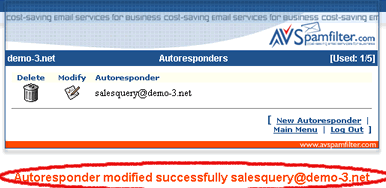
Deleting
an Existing Autoresponder
1. Click
on 'Autoresponders' in the Main Menu.

2. Click
on delete icon for the autoresponder you would like to delete.
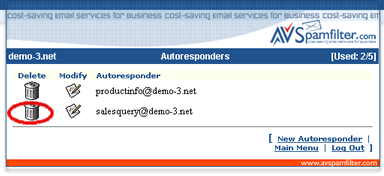
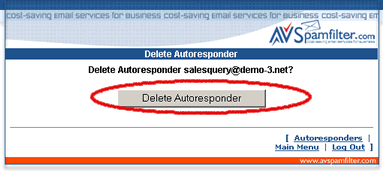
3. Click
on 'Confirm Delete' in the confirmation window.
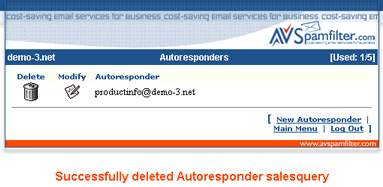
4. If successful
you'll see the action message in red (below) and the autoresponder was
removed from the list.
Return
to Support

