Add,
Change, Delete Email Accounts
In
this section we'll show you how to:
- Add
an email account
- Modify
an existing email account
- Delete
an email account
- Setup
catch-all accounts so that you can bounce, capture or
delete mis-addressed emails
- Add,
change, delete vacation messages
Add
a New Email Account
1.
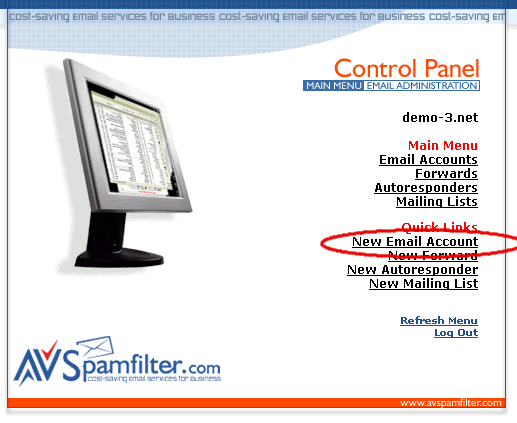
Click on 'New Email Account' in the Main Menu.
2.
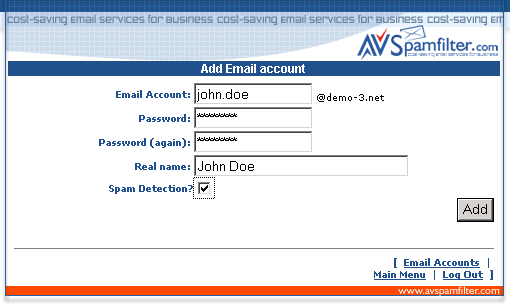
Enter the email account name, password, real name and
check the spam detection box to enable spam filtering.
Then click on the 'Add' button.
3.
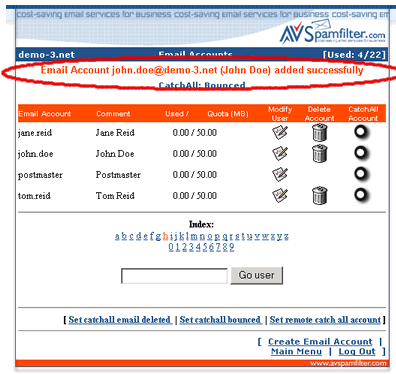
If successful you'll see the action message in red (below)
and the new account will be added to the list of email
accounts. Otherwise check that the email account name
does not duplicate an existing forward, autoresponder
or mailing list name and try again.
Modify
an Existing Email Account
1.
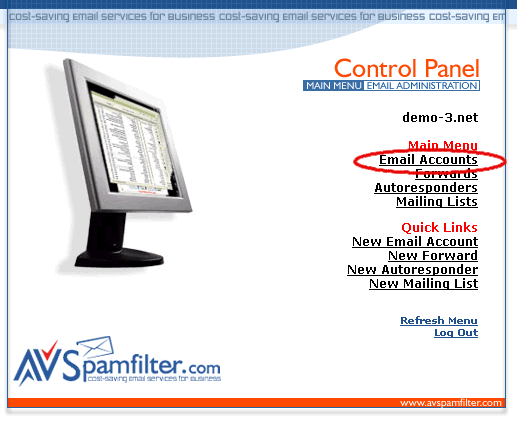
Click on 'Email Accounts' in the Main Menu.
2.
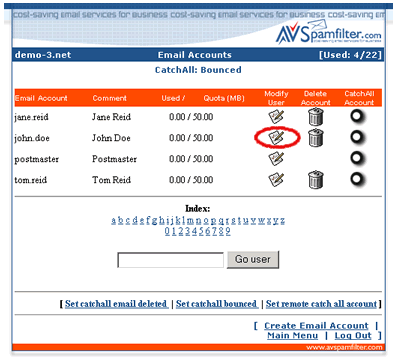
Click on the modify icon for the email account you wish
to modify.
2.
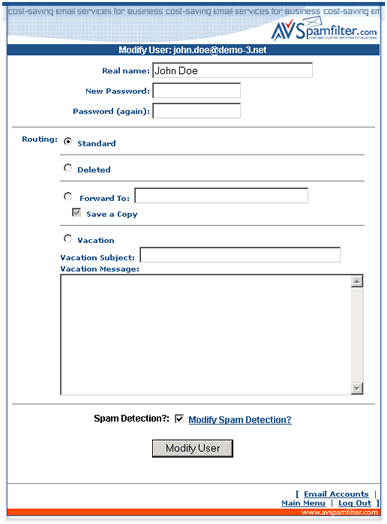
Enter the information you wish to change. You can enter
a new password; re-route email addressed to this account;
and either enable or disable spam filtering. Please see
the table of contents of this manual for information on
using spam preferences and vacation messages. Be sure
to click on the 'Modify User' button to save your changes.
Deleting
an Existing Email Account
1.
Click on 'Email Accounts' in the Main Menu.

2.
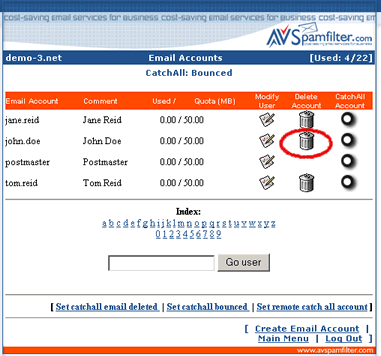
Click on the trash icon for the email account you wish
to delete.
3.
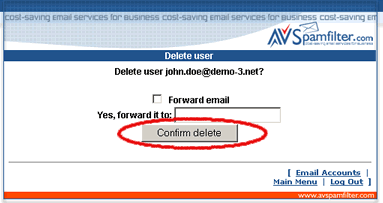
The delete user confirmation window appears. You can arrange
to have email addressed to the deleted account forward
elsewhere by checking the box and entering a forwarding
address. Otherwise just click on 'Confirm Delete'.
4.
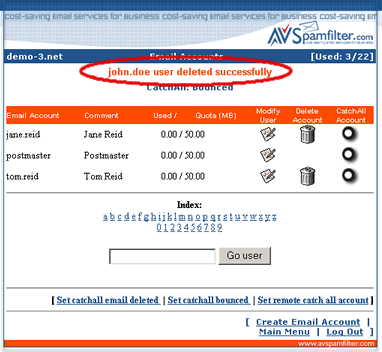
If successful you'll see the action message in red (below)
and the account will have been deleted from the list of
email accounts.
Bounce,
Capture, Delete Mis-addressed Email (Catch-all Account)
Email
to a misspelled email account at your domain can either
be rejected (i.e. bounced), deleted or directed to a valid
local or remote email account which is then known as a
catch-all account. A catch-all account is useful if you
are concerned that important emails are being addressed
to variations of email addresses such as, jon@your_domain.com
instead of the correct john@your_domain.com.
Important
Note about Catch-all Accounts: Enabling
a catch-all account makes your domain susceptible to spammer
dictionary attacks. This is an attack in which a spammer
sends his email to every conceivable name at a domain
in the hope that some of the email names are valid and
will get through. If you have a catch-all enabled everyone
of these emails will be accepted and be delivered to you.
Not only will you put an unneccessary load on the mailserver
but you risk exceeding your mail quota. In addition, the
spammer now mistakenly thinks that each name variation
is a valid email account and will continually send out
emails to these addresses. We highly recommend that you
select 'Set Catch-All Bounced' and not use a catch-all
account. You can simply setup email forwards for the name
variations you think you might need. Important:
We reserve the right to permanently disable catch-all
accounts if abused or the target of spamming attacks.
1.
Click on 'Email Accounts' in the Main Menu.

2.
Catch-all options:
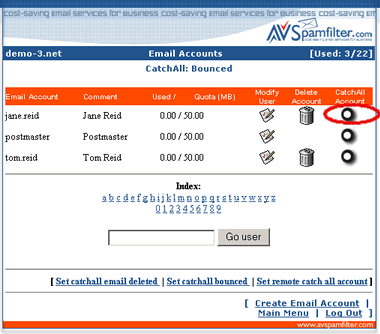
(A)
To use a local email account as the catchall for mis-addressed
email click on the catchall icon next to the email account
name
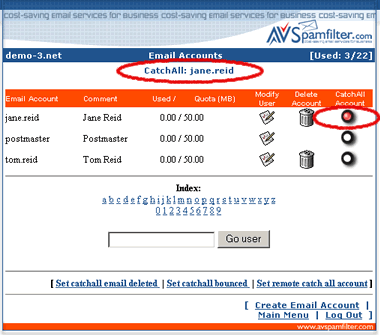
The
catchall icon turns red and the catchall destination changes
in the heading.
(B)
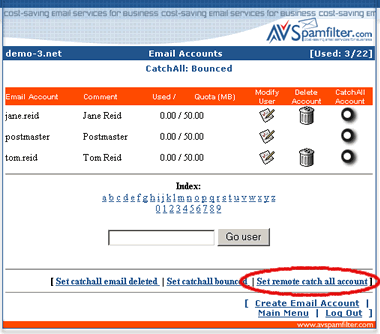
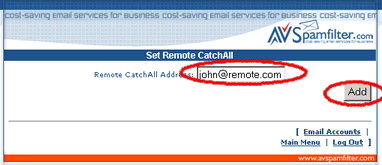
To use a remote email account as the catchall for mis-addressed
email click on 'Set Remote Catchall Account' at the bottom
of the window.
Enter
the remote email address and click on the Add button.
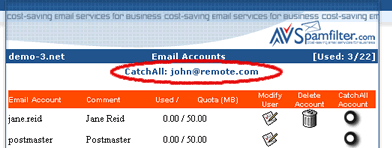
If
successful the remote address will appear in the catchall
destination at the top of the email account list window.
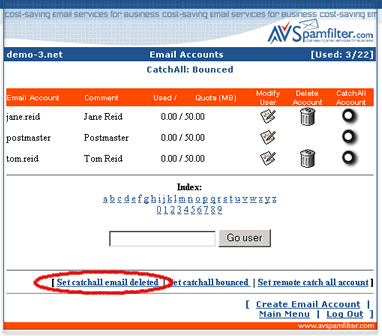
(C)
To delete mis-addressed email click on 'Set Catchall Email
Deleted' at the bottom of the window
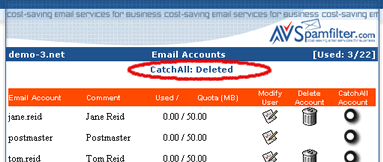
CatchAll
Delete will appear in the catchall destination at the
top of the email account listing.
(D)
To reject mis-addressed email click on 'Set Catchall Bounced'
at the bottom of the window (Recommended)
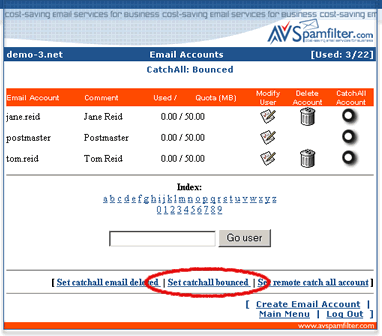
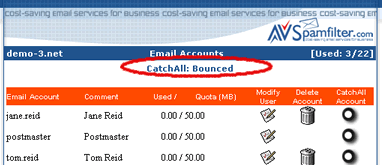
CatchAll:Bounced
will appear in the catchall destination at the top of
the email account listing.
Add,
Change, Delete Vacation Messages
1.
Click on 'Email Accounts' in the Main Menu.

2.
Click on the modify icon for the email account you wish
to add a vacation message

3.
Select the radio button for vacation and enter your subject
and message in the text boxes. A copy of each email received
will be saved in your email account and your vacation
notice will automatically be sent out to the sender. To
delete a vacation message select the radio button 'Standard
Routing'. To change a vacation message just edit the contents
of the message box. Be sure to click on 'Modify User'
to save your changes.

Return
to Support

